Apache Kafka is an open-source, event-driven messaging platform. It was built as a broker-based solution to handle streams of records on a topic. Typically, Kafka is used for asynchronous communication between the publishers and consumers of a topic. A publisher updates the records in a topic while a consumer gets access to the records.
You need Kafka to build distributed communication pipelines for your systems. Kafka messaging, stream processing, and storage are all Implemented in themselves. Using Kafka helps with modularizing your projects. A producer does not have to know who the consumer is, and neither does the consumer have to know who the producer is. All you need is access to the Kafka topic to either produce records or consume records.
Kafka is already awesome on its own, but with spring's opinionated approach, you get to write less boilerplate code.
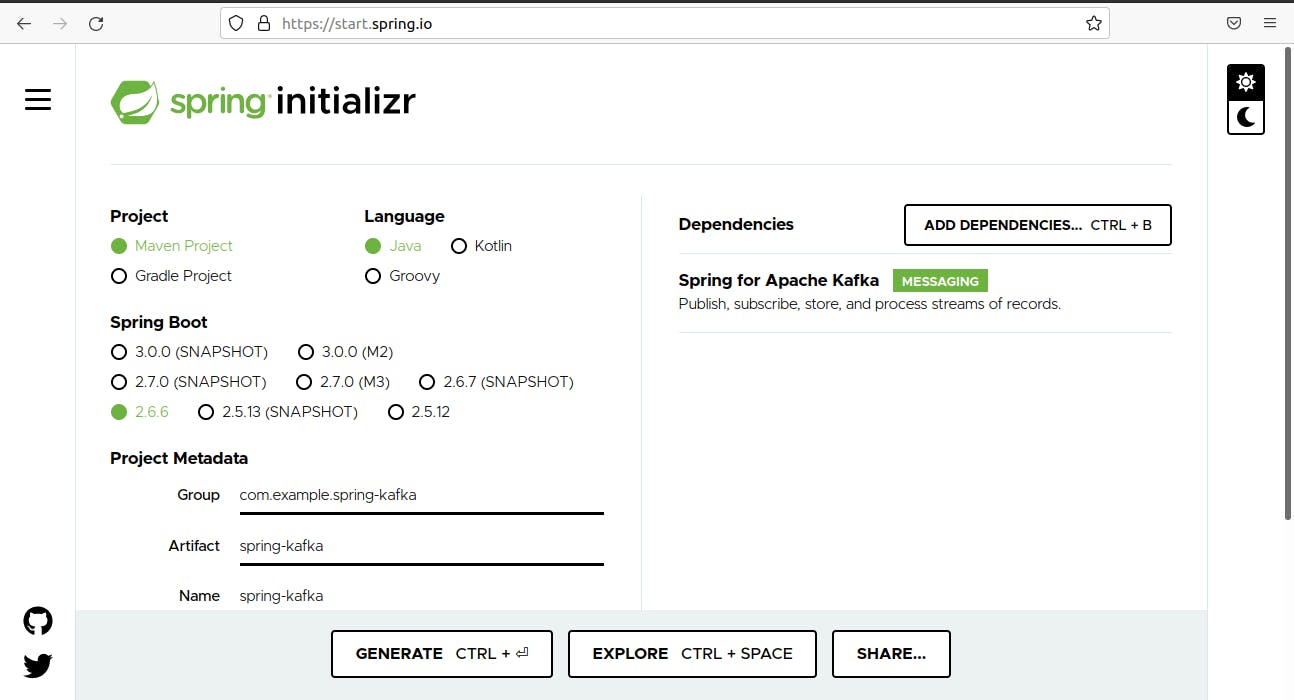
Creating spring-kafka project
You can go to start.spring.io to create a template for your spring project

You will then import the project template into your favorite IDE.
Setting up Kafka locally.
Setting up Kafka involves you downloading the kafka folder at https://kafka.apache.org/downloads.
After downloading, you should go to the root of the kafka folder, on your terminal. Then, start up the zookeeper server with the terminal command
bin/zookeeper-server-start.sh config/zookeeper.properties
Then you start the kafka server with the terminal command
bin/kafka-server-start.sh config/server.properties
Setting up Consumer Config
You can now go back to your IDE so that we can create configurations for Producer and Consumer.
Let us start with the Consumer configurations.
package com.example.springkafka.springkafka;

import org.apache.kafka.clients.consumer.ConsumerConfig;
import org.apache.kafka.common.serialization.StringDeserializer;
import org.springframework.beans.factory.annotation.Value;
import org.springframework.context.annotation.Bean;
import org.springframework.context.annotation.Configuration;
import org.springframework.kafka.annotation.EnableKafka;
import org.springframework.kafka.config.ConcurrentKafkaListenerContainerFactory;
import org.springframework.kafka.core.ConsumerFactory;
import org.springframework.kafka.core.DefaultKafkaConsumerFactory;

import java.util.HashMap;
import java.util.Map;

@EnableKafka
@Configuration
public class KafkaConsumerConfig {

    @Value ("${kafka.bootAddress}")
    String kafkaBootAddress;

    @Bean
    public ConsumerFactory<String, String> consumerFactory() {
        Map<String, Object> properties = new HashMap<>();
        properties.put(
                ConsumerConfig.BOOTSTRAP_SERVERS_CONFIG,
                kafkaBootAddress);
        properties.put(
                ConsumerConfig.KEY_DESERIALIZER_CLASS_CONFIG,
                StringDeserializer.class);
        properties.put(ConsumerConfig.GROUP_ID_CONFIG, "groupId");
        properties.put(
                ConsumerConfig.VALUE_DESERIALIZER_CLASS_CONFIG,
                StringDeserializer.class);
        return new DefaultKafkaConsumerFactory<>(properties);
    }

    @Bean
    public ConcurrentKafkaListenerContainerFactory<String, String>
    kafkaListenerContainerFactory() {

        ConcurrentKafkaListenerContainerFactory<String, String> factory =
                new ConcurrentKafkaListenerContainerFactory<>();
        factory.setConsumerFactory(consumerFactory());
        return factory;
    }
}
The above code snippet involves two methods that each returns a bean. Firstly, let us talk about the theKafkaListenerContainerFactory method that returns the bean we need, the ConcurrentKafkaListenerContainerFactory<?,?> bean. This object needs a ConsumerFactory for it to know the properties of the Consumer.
We create an instance of a ConsumerFactory in the first method. The method creates a map, called properties, of enums from the ConsumerConfigclass as keys and Strings as values. The map is then injected into the DefaultKafkaConsumerFactory<> which is a subclass of ConsumerFactory
Setting up Producer Config
package com.example.springkafka.springkafka;

import org.apache.kafka.clients.admin.NewTopic;
import org.apache.kafka.clients.producer.ProducerConfig;
import org.apache.kafka.common.serialization.StringSerializer;
import org.springframework.beans.factory.annotation.Value;
import org.springframework.context.annotation.Bean;
import org.springframework.context.annotation.Configuration;
import org.springframework.kafka.config.TopicBuilder;
import org.springframework.kafka.core.DefaultKafkaProducerFactory;
import org.springframework.kafka.core.KafkaTemplate;
import org.springframework.kafka.core.ProducerFactory;
import org.springframework.stereotype.Component;

import java.util.HashMap;
import java.util.Map;

@Configuration

public class KafkaProducerConfig {

    @Value("${kafka.bootAddress}")
    String kafkaBootAddress;

    @Bean
    public ProducerFactory<String, String> producerFactory() {
        Map<String, Object> configProps = new HashMap<>();
        configProps.put(
                ProducerConfig.BOOTSTRAP_SERVERS_CONFIG,
                kafkaBootAddress);
        configProps.put(
                ProducerConfig.KEY_SERIALIZER_CLASS_CONFIG,
                StringSerializer.class);
        configProps.put(
                ProducerConfig.VALUE_SERIALIZER_CLASS_CONFIG,
                StringSerializer.class);
        return new DefaultKafkaProducerFactory<>(configProps);
    }
    @Bean
    public NewTopic topicExample() {
        return TopicBuilder.name("topic")
                .partitions(1)
                .replicas(1)
                .build();
    }

    @Bean
    public KafkaTemplate<String, String> kafkaTemplate() {
        return new KafkaTemplate<>(producerFactory());
    }
}
The above code snippet involves three methods that each return a bean. Firstly, let us talk about the theKafkaTemplate method that returns a KafkaTemplate instance. The KafkaTemplate needs a ProducerFactory instance for it to know the properties of the Producer.
We create an instance of a ProducerFactory in the first method. The method creates a map, called producerConfig, which uses enums from the ProducerConfigclass as keys and Strings as values. The map is then injected into the DefaultKafkaConsumerFactory<> which is a subclass of ConsumerFactory
The third method in the snippet is for creating a topic. The method uses a builder model with
- Name: To set the name of the topic.
- Replicas: To set the number of replicas.
- Partitions: To set the number of partitions.
Finishing up
package com.example.springkafka.springkafka;

import org.springframework.beans.factory.annotation.Autowired;
import org.springframework.boot.ApplicationArguments;
import org.springframework.boot.ApplicationRunner;
import org.springframework.boot.SpringApplication;
import org.springframework.boot.autoconfigure.SpringBootApplication;
import org.springframework.kafka.annotation.KafkaListener;
import org.springframework.kafka.core.KafkaTemplate;

@SpringBootApplication
public class SpringKafkaApplication implements ApplicationRunner {

    @Autowired
    public KafkaTemplate<String, String> kafkaTemp;

    public void send(String message){
        kafkaTemp.send("topic", message);
    }

    public static void main(String[] args) {
        SpringApplication.run(SpringKafkaApplication.class, args);
    }

    @KafkaListener(topics = "topic", groupId = "groupId")
    public void listen(String message) {
        System.out.println("Received Messasge in group - group-id: " + message);
    }
    @Override
    public void run(ApplicationArguments args) throws Exception {
        send("Hi Welcome to Spring For Apache Kafka");
    }

}
For you to send messages with Kafka, you have to first autowire the Kafka template. You then send the message with kafkaTemp.send().
You listen for messages by annotating a method with @KafkaListener. The method has to have a parameter with the same Type as our message, in our case, our Type is String.
Conclusion
The most beautiful thing about Spring-Kafka is that it covers a lot of boilerplate code you would have otherwise written.
